
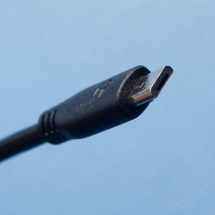
Software, sounds and music can be updated on Gloria, using a USB flash memory stick and adapter cable. The cable can be any generic USB 2.0 adapter with a Type A socket on one end and a micro plug on the other end.

The plug end connects to Gloria:
The socket end is for connecting a USB memory stick:

Most memory sticks will work fine, although you’ll get the best results from recent, small memory sticks.

Gloria has a relatively low amount of power it can provide to the USB port to power the memory stick, so older devices that require higher power may not work. Format the memory stick as FAT32.
An alternative to the adapter cable is a micro adapter, although this can be flimsy and finicky to use. It has the micro plug and the Type A socket built into one device, with no cable.

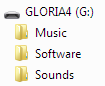
Create the following folders on the memory stick: Music, Software and Sounds.
Copy the software update file into the Software folder, copy the instruments update file into the Sounds folder, and copy update files for existing hymnbooks (or new hymnbook files) into the Music folder.
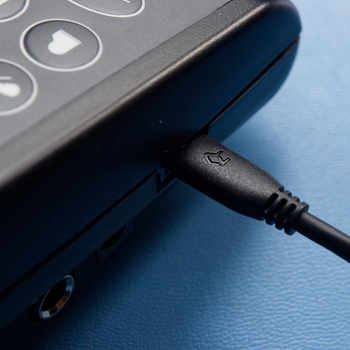
Start with Gloria off. Connect the memory stick to the adapter cable and connect the cable to Gloria.
Turn Gloria on. Wait for the update menu to appear.

Do the software update first if you have multiple files to update. Music and sounds files can be updated in any order.
Press the # key to go to the next menu, and the * key to go to the previous menu. Press the Play key to select the displayed menu item. Press the Stop key to go back up to the main update menu.
Load Software
From the Load Software menu on the Gloria screen, press the Play key.

The screen will display the first file in the Software folder on the USB memory stick. Use the # key to cycle through the files to find the one you want if there are several files in the folder. Gloria software files start with “G” followed by the software version number. In the example above it’s version 4.0.2.15. The file extension is “.gmc”.
Press the Play key when the intended file is displayed.

Press the Play key to update the Gloria software with the selected file. The update process is brief, but Gloria must remain powered for the entire process. Use reasonably fresh batteries or an external power source. Gloria may not be usable if power is lost partway through the update. If this happens you will need to contact Gloria Music and send it for servicing.
Press the Stop key to return to the previous step without performing the software update.
Gloria will display the following message while the software is being updated. Do not turn off the power or remove the memory stick during the update!

Gloria will automatically turn off when the update is complete. There will not be any further confirmation messages. See the end of this section on how to verify the update.
Remove the USB adapter cable once Gloria is off, if there are no more updates. Leave the cable connected if you still have music or sounds files to update.
Load Sounds
Press the # key to go to the Load Sounds menu on the Gloria screen and then press the Play key.

The screen will display the first file in the Sounds folder on the USB memory stick. Use the # key to cycle through the files to find the one you want if there are several files in the folder. The official Gloria instruments file is “GLORIA4S.GMC”.

Press the Play key when the intended file is displayed.

Press the Play key to update the Gloria instruments with the selected file. Gloria must remain powered for the update process. Use reasonably fresh batteries or an external power source. If power is lost partway through the update Gloria will not be usable, but you can attempt the same update and will be able to recover by successfully completing the update. You will not need to send Gloria for servicing.
Press the Stop key to return to the previous step without performing the update.
Gloria will display the following message while the sounds are being updated. The progress bar fills while loading the file. Do not turn off the power or remove the memory stick during the update!

Gloria will return to the Load Sounds menu when the update is complete. There will not be any further confirmation messages. See the end of this section on how to verify the update.
Remove the USB adapter cable if there are no more updates. Gloria will proceed with the normal startup process. Leave the cable connected if you still have music files to update.
Load Music
Press the # key to go to the Load Music menu on the Gloria screen and then press the Play key.

The screen will display the first file or sub-folder in the Music folder on the USB memory stick. Use the # key to cycle through the files and folders to find the one you want if there are several in the folder. Music can be loaded as a complete hymnbook in a single file, or as a collection of individual MIDI files plus a table of contents file in a folder. Hymnbooks from Gloria Music will have the extension “.gmc”. Hymnbooks from other sources will have the extension “.enc”. Folders of MIDI files will have no extension.

Press the Play key when the intended file or folder is displayed.

If the selected hymnbook already exists on Gloria then a confirmation message appears. Press the Play key to update the Gloria hymnbook with the selected file. There is no confirmation message if the hymnbook is new. Gloria must remain powered for the update process. Use reasonably fresh batteries or an external power source. If power is lost partway through the update then that hymnbook will not be usable, but you can attempt the same update and will be able to recover by successfully completing the update. You will not need to send Gloria for servicing.
Press the Stop key to return to the previous step without performing the update.
Gloria will display the following message while the hymnbook is being updated. The progress bar fills while loading the file. Do not turn off the power or remove the memory stick during the update!

The loading progress screen may flash by too fast to see if the file is small. Gloria will return to the Load Music menu when the update is complete. There will not be any further confirmation messages. See the end of this section on how to verify the update. If the hymnbook was loaded from a folder of MIDI files, connect the USB memory stick to a computer and check the folder for a log file in case there were any loading errors. See the manual on Creating Music to learn how to make your own hymnbook for Gloria.
Remove the USB adapter cable if there are no more updates. Gloria will proceed with the normal startup process. Leave the cable connected if you have more music files to update.
Verify
Gloria will continue with the normal startup process once the USB adapter cable is removed.

Press the # key while the startup screen is displayed to access the setup menu. If the startup screen is replaced by the hymn prompt with flashing cursor, press and hold the # key for three seconds to access the setup menu. In the setup menu press the # key repeatedly to get to the System Info menu and then press the Play key.

Press the # key to cycle through the various System Info screens and note the version numbers.

If you updated the software, does the software version match the file you selected?

If you updated the music, does the hymnbook version match the file you selected? Note that if there is more than one hymnbook on Gloria, the System Info menu will only show the currently selected hymnbook. You may need to go back to the Select Hymnal menu to change hymnbooks in order to verify a specific hymnbook version. The percentage displayed is how much the hymnbook’s table of contents takes up of the space available to it.

If you updated the instruments, does the sounds version match the file you selected? The percentage displayed is how much the instruments table of contents takes up of the space available to it.

If you’re interested, you can also see how much of Gloria’s flash memory is in use. In this example, 60% of the memory space available for instruments is used, and 15% of the memory space available for hymnbooks is used.
Press the Stop key to go back up to the main setup menu. Press the Stop key again to return to the normal hymn prompt. The setup menu will automatically revert to the hymn prompt after several seconds of inactivity.
The final check is to enter a hymn number and press Play. If you hear music, congratulations! You’re done. If you run into any difficulties contact Gloria Music.